Guide on How to Download Twitch Highlights in Bulk
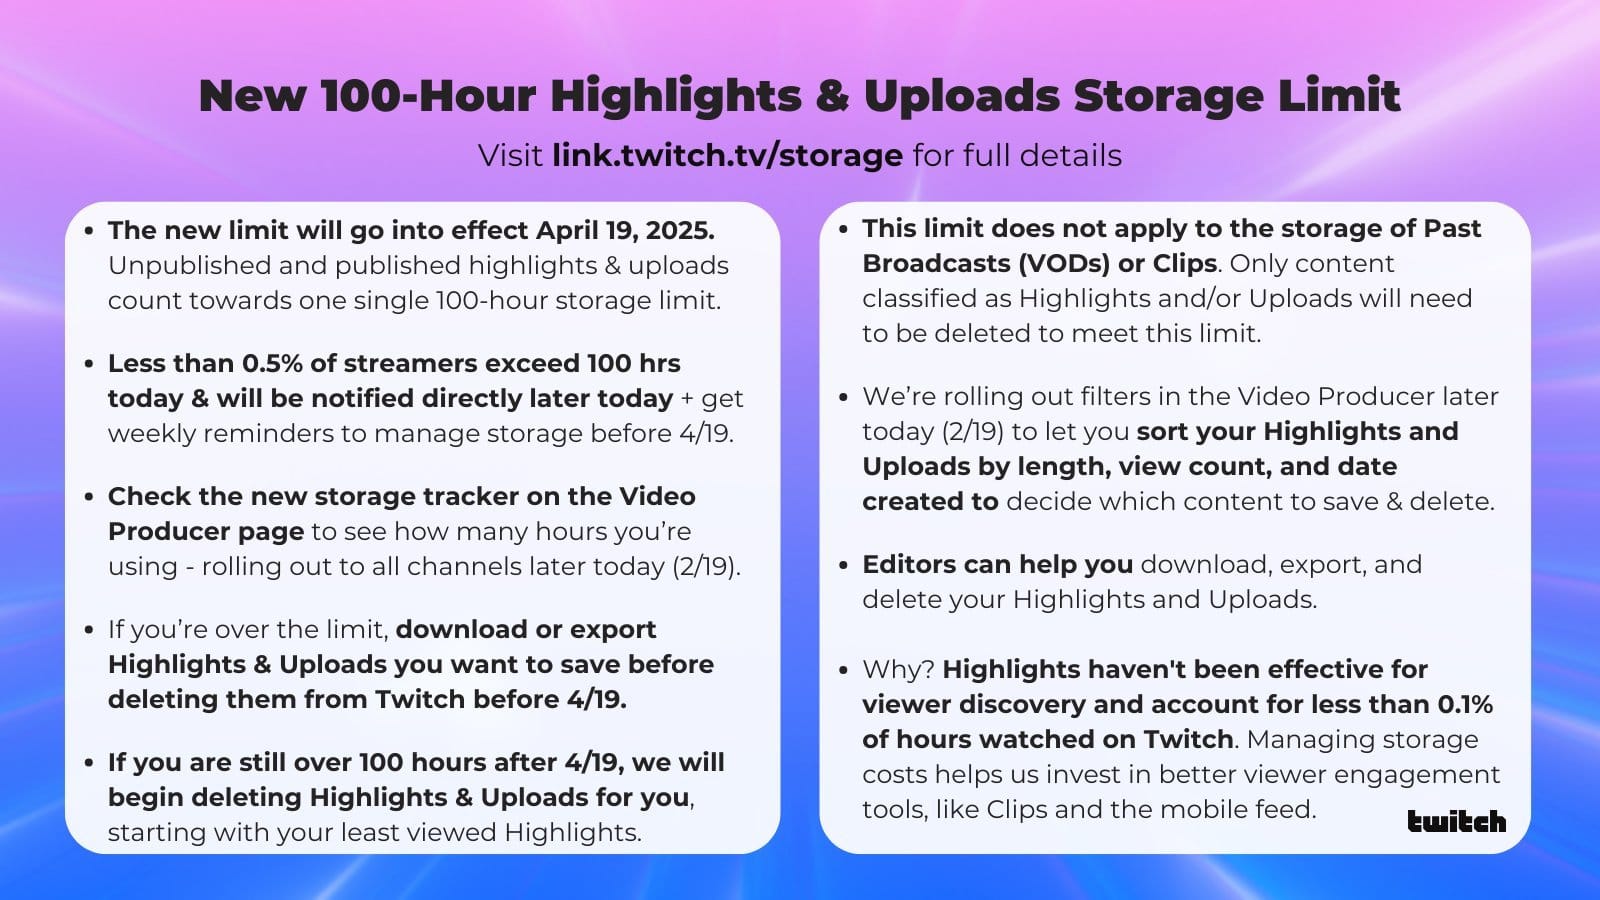
Yesterday (February 19, 2025), Twitch announced that they would be introducing a storage limit on Highlights and Uploads starting on April 19, 2025. Any amount of highlighted content over the 100-hour limit will be subject to deletion on April 20, 2025. Unfortunately, Twitch offered no solutions to make this process easier on impacted creators, leading many to scramble to figure out where to start.
NOTE: This new limit does NOT impact VODs (which already have a time-based deletion) nor Clips, which are currently available indefinitely.
This morning, a guide was shared directly with Twitch Partners from Twitch on how to use third-party services to address this. I'm making it available to everyone.
A caveat: This is beyond my knowledge, so I've made no edits to the original documentation. I'd assume it works, considering it was directly shared with Partners by Twitch. But, if I find a better solution, I will replace this in the future with that.
Overview
This simple guide explains how to download all videos from your channel, whether uploads, past broadcasts, or highlights.
Required Apps/Downloads
Twitch Downloader: https://github.com/lay295/TwitchDownloader
This is the tool we will use to bulk download videos from Twitch. It supports both a GUI (Graphical User Interface) and a CLI (Command Line Interface). This guide will focus on the GUI interface only available on Windows Users on Linux or Mac will have to use the CLI version, which is beyond the scope of this guide. To download this tool, go to the releases page and click on the link in the “Assets” section that applies for your computer. This guide assumes you will be downloading “TwitchDownloaderGUI-1.55.2-Windows-x64.zip.
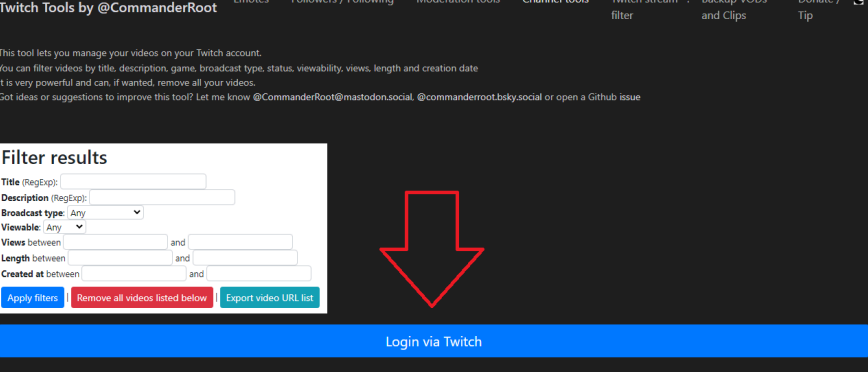
CommanderRoot’s Video Manager: https://twitch-tools.rootonline.de/vod_manager.php
This web-based application is used to pull the list of video URLs, which can be used by the Twitch Downloader application above.
Step-by-Step Guide
- Navigate to Commander Root’s Video Manager
- Click the “Login via Twitch” button on the page.
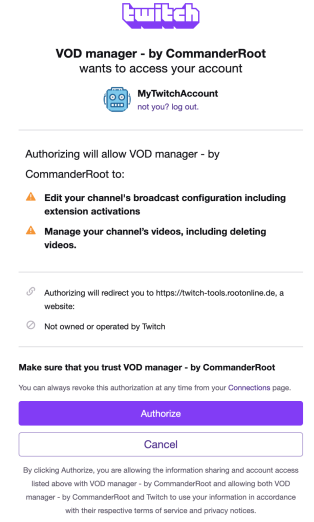
- You will be shown an authorization page if this is your first time using the Video Manager. Accept the authorization to continue.
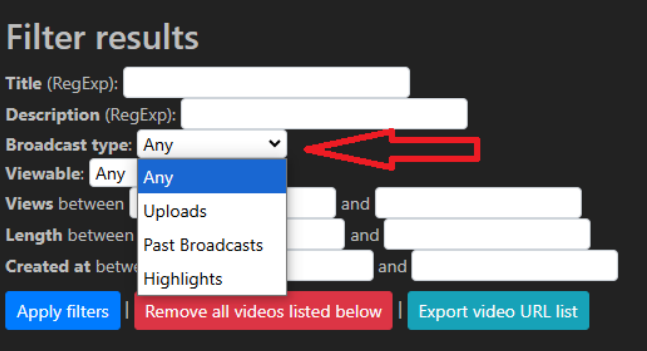
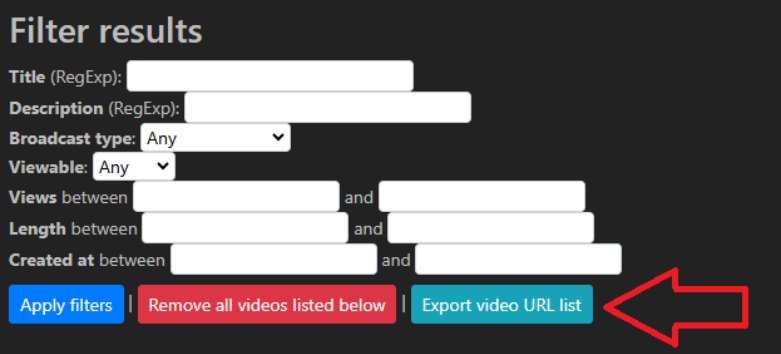
- You should now see a list of all videos from your channel. Click the broadcast type dropdown to select the type of video you would like to download. Your options are Any (All videos), Past Broadcasts, Uploads, and highlights. If you would like to only download videos affecting your quota, repeat this and the following step for “Uploads” and then “Highlights.”
- Click the “Export video URL list” button. This will download a CSV (Comma-Separated Values) file that provides the URLs of all videos based on the filter selected in the previous step.
- We will now launch the Twitch Downloader program by unzipping/unarchiving the “TwitchDownloaderGUI-1.55.2-Windows-x64.zip” downloaded file mentioned in required apps above, and then opening “TwitchDownloaderWPF.exe”.
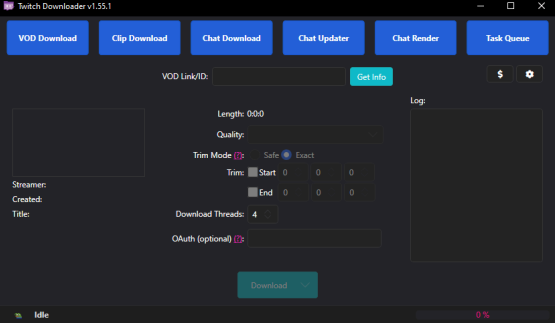
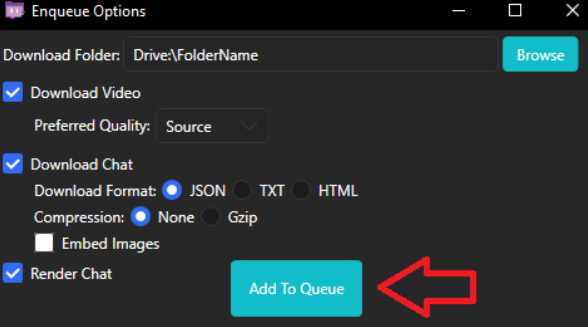
- (Optional) You may want to change your "Cache Folder" to a different drive if you're limited on your main drive space. To do this, click the Gear icon under Task Queue and select a different drive.
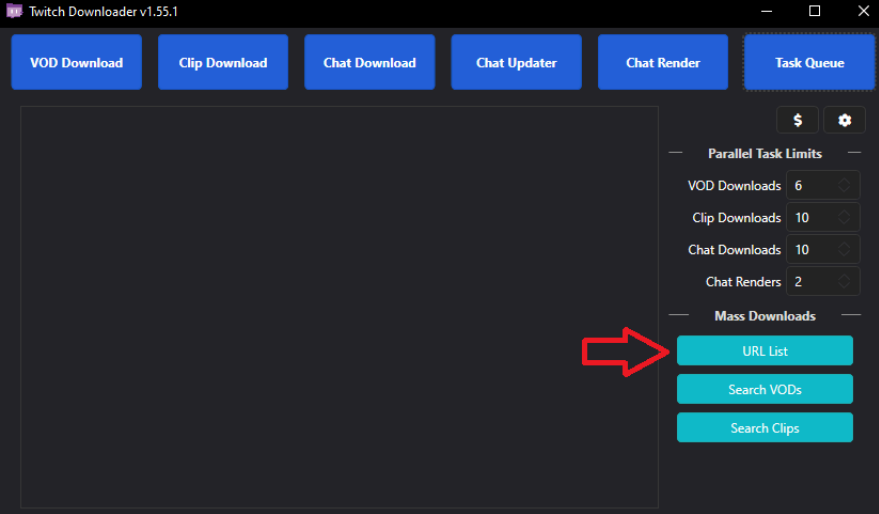
- Click on the “Task Queue” button.

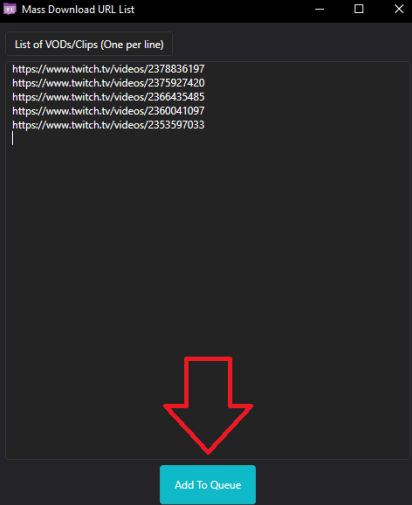
- Click on the” URL List” button
- Copy and paste the URLs from the video manager download(s) into the URL list.
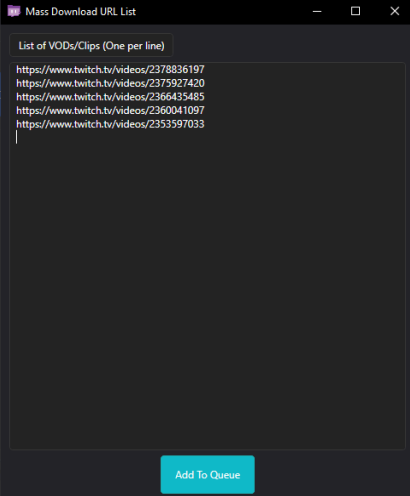
- Click the “Add To Queue” button
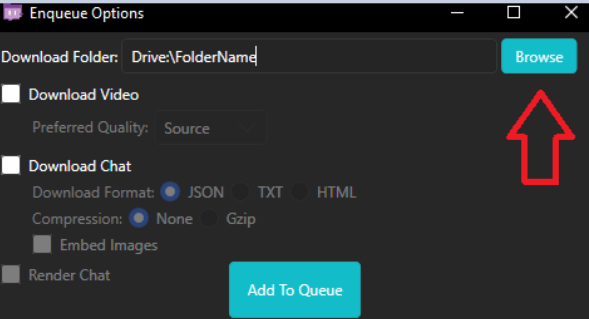
- Select a folder to download your videos via the “Downloader Folder” option (either by typing in the location or by clicking the “Browse” button).
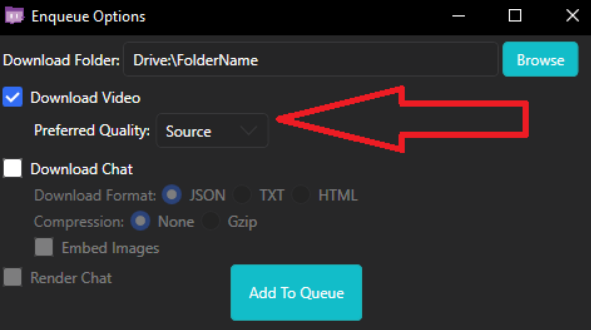
- Check the “Download Video” box and select the quality level (Source is recommended)
- If you would like your chat logs from the video as well, click “Download Chat”. You can also click “Render Chat” if you would like the program to create a video of your chat automatically
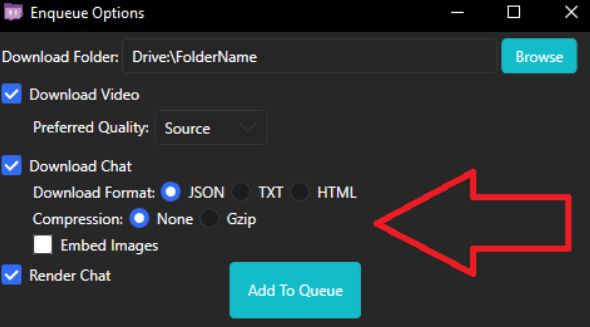
- Click “Add to Queue”
- The manager will begin to download all video URLs entered. You will see multiple downloads per video if you selected more than one option (i.e. Download Chat and/or Render Chat)
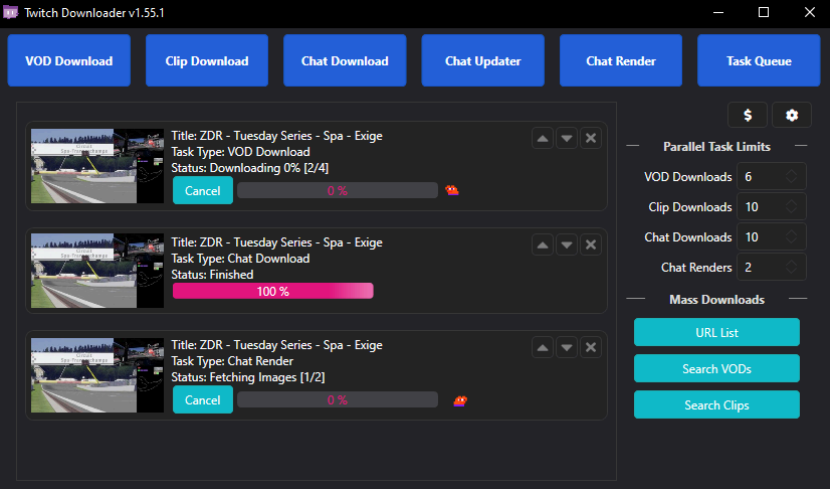
- Once the program finishes downloading, you will find all videos and files in the folder specified in step 11.
No spam, no sharing to third party. Only you and me.


Member discussion